MaixCAM MaixPy 人脸检测和关键点检测
简介
人脸检测在很多地方都能用到,比如是为人脸识别提供人脸检测这一步骤,或者是人脸跟踪相关的应用等等。
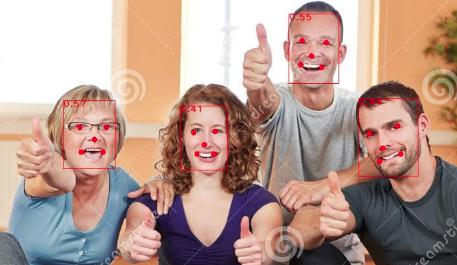
这里提供的人脸检测不光可以检测到人脸,还能检测到 5 个关键点,包括两个眼睛,一个鼻子,一张嘴巴的两个嘴角。

MaixPy 中使用人脸检测
MaixPy 官方提供了三种人脸检测模型,分别来自开源项目 face detector 1MB with landmark 和 Retinafate 以及 YOLOv8-face。
这三种模型都可以用,YOLOv8-face 效果比较好但是速度略微慢一些,可以自己实际测试选择使用。
使用YOLOv8-face:(需要 MaixPy 版本 >= 4.3.8)
from maix import camera, display, image, nn, app

detector = nn.YOLOv8(model="/root/models/yolov8n_face.mud", dual_buff = True)

cam = camera.Camera(detector.input_width(), detector.input_height(), detector.input_format())
disp = display.Display()

while not app.need_exit():
    img = cam.read()
    objs = detector.detect(img, conf_th = 0.5, iou_th = 0.45, keypoint_th = 0.5)
    for obj in objs:
        img.draw_rect(obj.x, obj.y, obj.w, obj.h, color = image.COLOR_RED)
        msg = f'{detector.labels[obj.class_id]}: {obj.score:.2f}'
        img.draw_string(obj.x, obj.y, msg, color = image.COLOR_RED)
        detector.draw_pose(img, obj.points, 2, image.COLOR_RED)
    disp.show(img)
另外两种模型使用方法:
这里有一行被注释了代码是加载Retinafae模型,根据你下载的模型选择使用哪一行代码
from maix import camera, display, image, nn, app
import math


detector = nn.Retinaface(model="/root/models/retinaface.mud")
# detector = nn.FaceDetector(model="/root/models/face_detector.mud")

cam = camera.Camera(detector.input_width(), detector.input_height(), detector.input_format())
disp = display.Display()

while not app.need_exit():
    img = cam.read()
    objs = detector.detect(img, conf_th = 0.4, iou_th = 0.45)
    for obj in objs:
        img.draw_rect(obj.x, obj.y, obj.w, obj.h, color = image.COLOR_RED)
        radius = math.ceil(obj.w / 10)
        img.draw_keypoints(obj.points, image.COLOR_RED, size = radius if radius < 5 else 4)
    disp.show(img)
模型下载和其它分辨率模型
下载模型,下载的压缩包里面有多个分辨率可以选择,分辨率越高越精准但耗时更长:
dual_buff 双缓冲区加速
你可能注意到这里模型初始化使用了dual_buff(默认值就是 True),使能 dual_buff 参数可以加快运行效率,提高帧率,具体原理和使用注意点见 dual_buff 介绍。
检测更多关键点
这里提供的人脸关键点检测基本都是一次性检测到几个点,但是缺点是点比较少,要想检测到更多点和更加精准的点,请看人脸关键点文档

 中文
中文