English
MaixCAM MaixPy Quick Start
| Resource Summary | Link |
|---|---|
| Tutorial Documentation 📖 | wiki.sipeed.com/maixpy/en/ |
Examples and Source Code  |
github.com/sipeed/MaixPy |
| MaixCAM Hardware 📷 | wiki.sipeed.com/maixcam wiki.sipeed.com/maixcam-pro wiki.sipeed.com/maixcam2 |
| API Documentation 📚 | wiki.sipeed.com/maixpy/api/ |
| MaixHub App Store 📦 | maixhub.com/app |
| MaixHub Sharing Square 🎲 | maixhub.com/share |
| Open Source Projects 📡 | GitHub Search:MaixCAM / MaixCAM2 / MaixPy |
For an introduction to MaixPy, please see the MaixPy official website homepage
Please give the MaixPy project a Star ⭐️ to encourage us to develop more features if you like MaixPy.
Quick Preview
Before Start
- Please carefully follow the steps outlined in this document. Do not skip any sections, and compare your actions accordingly.
- Pay close attention to the table of contents on the left. Be sure to read through the basic sections thoroughly and patiently.
- Before asking questions, first search the documentation in the left-hand table of contents and review the FAQ.
- This document is the
MaixPy v4 Tutorial. Be mindful not to confuse it with the MaixPy-v1 (K210 series), and ensure you are referring to the correct documentation.
Get a MaixCAM/MaixCAM2 Device
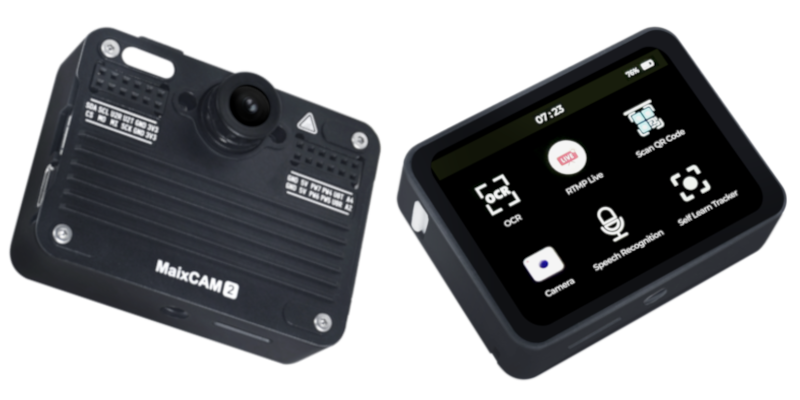
Basic Information:MaixCAM2 Introduction & Resources
Purchase Links:Sipeed Taobao or Sipeed AliExpress
MaixCAM currently has several versions. Choose according to your needs:
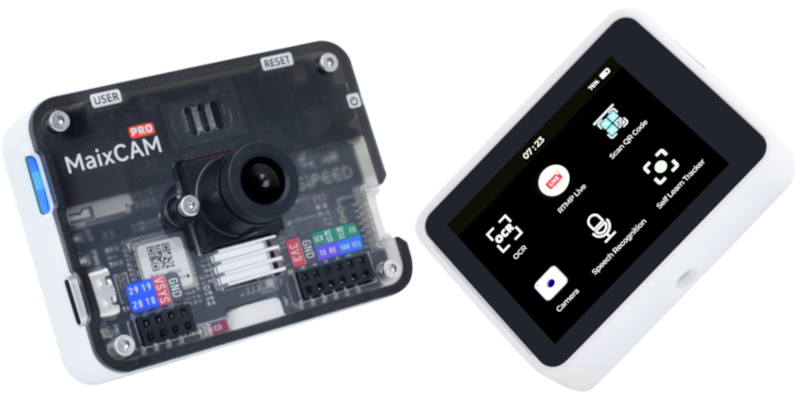
| MaixCAM-Pro(Recommended) | Baisc Infomation:MaixCAM-Pro Introduction & Resources Purchase Links:Sipeed Taobao or Sipeed AliExpress |
| MaixCAM | Baisc Infomation:MaixCAM Introduction & Resources Purchase Links:Sipeed Taobao or Sipeed AliExpress |
| MaixCAM-Lite(Not Recommended) | Screenless and caseless version, more affordable. Not recommended for learning/development, but may be considered for mass production. |
Note that currently only the MaixCAM development board is supported. Other development boards with the same chip are not supported, including Sipeed's development boards with the same chip. Please be careful not to purchase the wrong board, which could result in unnecessary waste of time and money.
Getting Started
Please select the documentation corresponding to your hardware platform to proceed:
| Hardware Platform | Getting Started Guide |
|---|---|
| MaixCAM Lite | Quick Start MaixCAM(Screenless Version) |
| MaixCAM/MaixCAM Pro | Quick Start MaixCAM |
| MaixCAM2 | Quick Start MaixCAM2 |
Next Steps
If you like what you've seen so far, please be sure to give the MaixPy open-source project a star on GitHub (you need to log in to GitHub first). Your star and recognition is the motivation for us to continue maintaining and adding new features!
Up to this point, you've experienced the usage and development workflow. Next, you can learn about MaixPy syntax and related features. Please follow the left sidebar to learn. If you have any questions about using the API, you can look it up in the API documentation.
It's best to learn with a specific purpose in mind, such as working on an interesting small project. This way, the learning effect will be better. You can share your projects and experiences on the MaixHub Share Plaza and receive cash rewards!
Frequently Asked Questions (FAQ)
If you encounter any problems, please check the FAQ first. If you cannot find a solution there, you can ask in the forums or groups below, or submit a source code issue on MaixPy issue.
Share and Discuss
- MaixHub Project and Experience Sharing: Share your projects and experiences, and receive cash rewards. The basic requirements for receiving official rewards are:
- Reproducible: A relatively complete process for reproducing the project.
- Showcase: No detailed project reproduction process, but an attractive project demonstration.
- Bug-solving experience: Sharing the process and specific solution for resolving a particular issue.
- MaixPy Official Forum (for asking questions and discussion)
- Telegram: MaixPy
- MaixPy Source Code Issues: MaixPy issue
- For business cooperation or bulk purchases, please contact support@sipeed.com.