

 English
Update Application
Update history
| Date | Version | Author | Update content |
|---|---|---|---|
| 2024-8-13 | v0.1 | xwj |
|
Power On
- Connect the NanoKVM's wired network port with an Ethernet cable.
- Use a standard HDMI cable to connect the remote host to the NanoKVM's HDMI port.
- Use a USB C to A data cable to connect the remote host to the NanoKVM's PC USB port.
Once all cables are connected, the NanoKVM will automatically power on. It takes about one to two minutes to boot up.
Obtain IP Address
The NanoKVM Full version will display the IP address on the screen after booting, so you can skip this step. The NanoKVM Lite version can obtain the IP address using the following methods.
Check on the Router or Switch
The NanoKVM will obtain an IP address via DHCP after booting. You can find the IP address assigned to the NanoKVM on your router or switch.
Check via Serial Port
Connect to the NanoKVM using a serial tool to get its IP address.
Check via USB RNDIS Network Interface
If the remote host is running Windows, refer to usb rndis network interface for driver installation.
Open a terminal on the remote host.
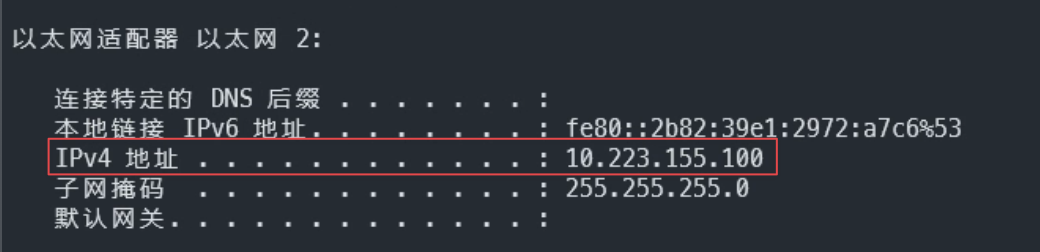
Execute the
ifconfigcommand (oripconfigon Windows).Find the IPv4 address starting with 10 in the network list, as shown below:
SSH into the NanoKVM using:
ssh root@10.223.155.1(note, not 10.223.155.100), with the passwordroot: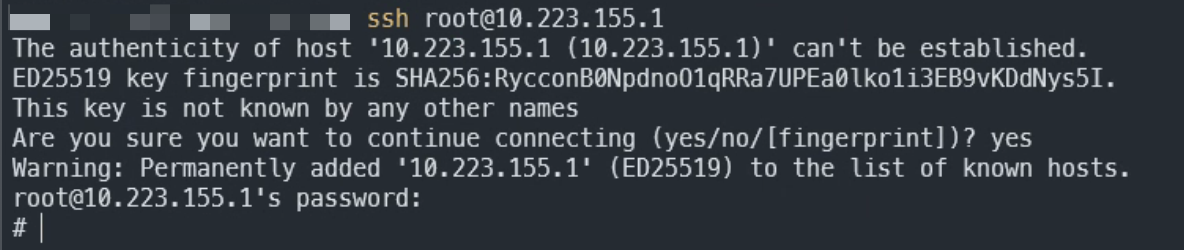
After entering the NanoKVM, execute
ifconfigand find the address of theeth0network card. This is the NanoKVM's IP address: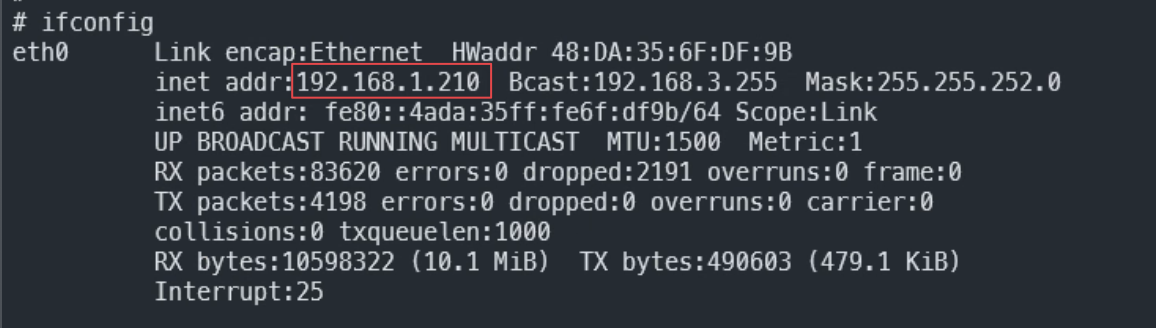
Once you have the IP address, you can use it to access the NanoKVM.
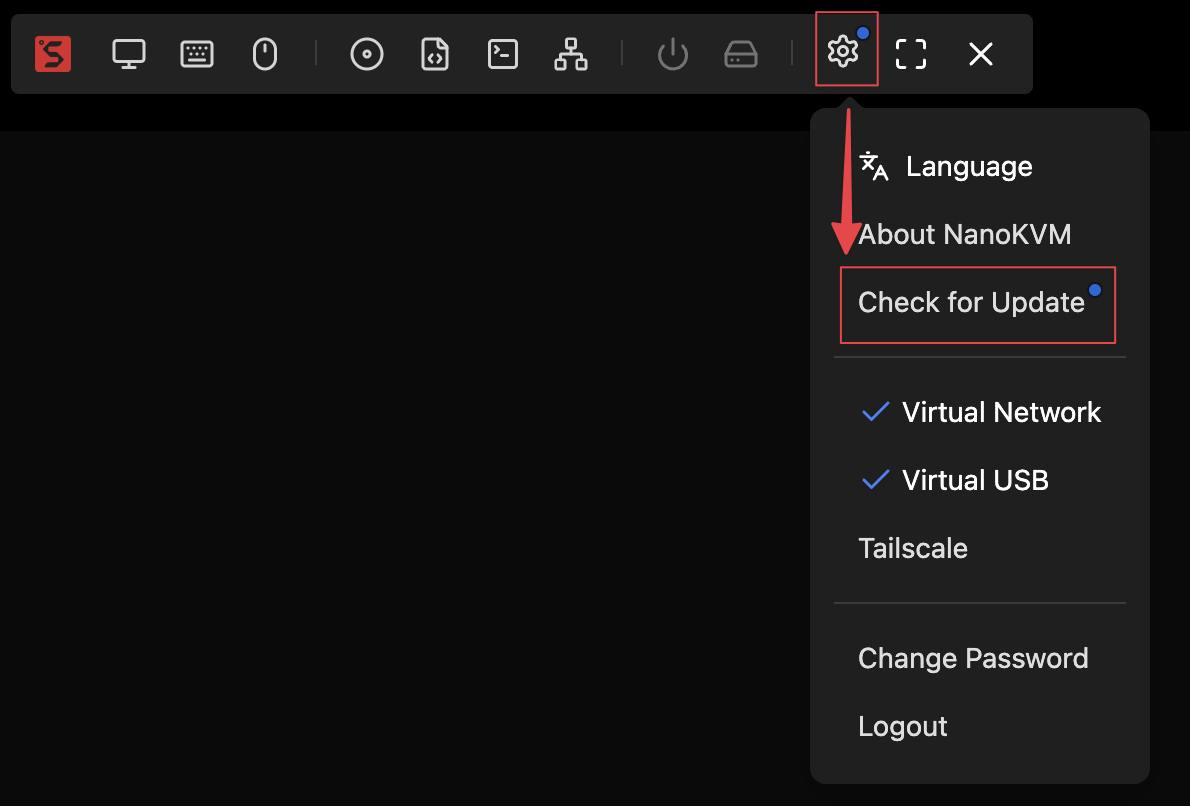
Check for Updates
Use any computer connected to the same network as the NanoKVM.
Open a browser (Chrome is recommended) and enter the obtained IP address in the address bar.
You will be directed to a login page. Enter the default username
adminand passwordadminto log in: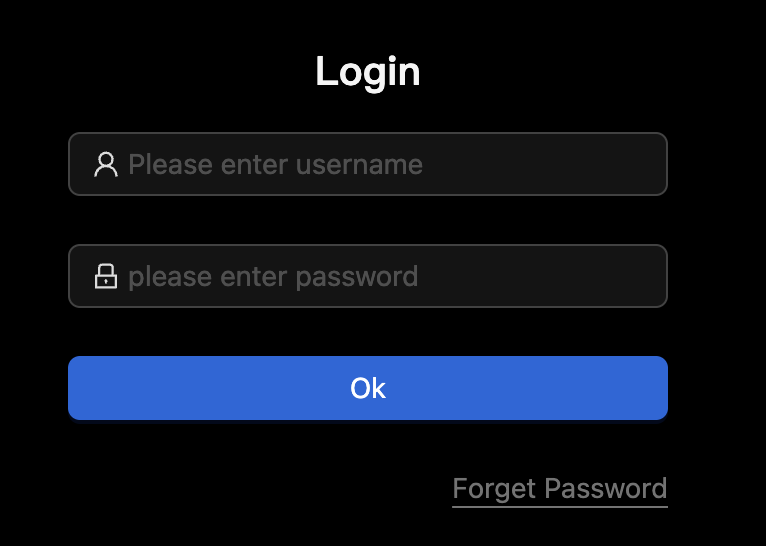
After logging in, click on check for updates:
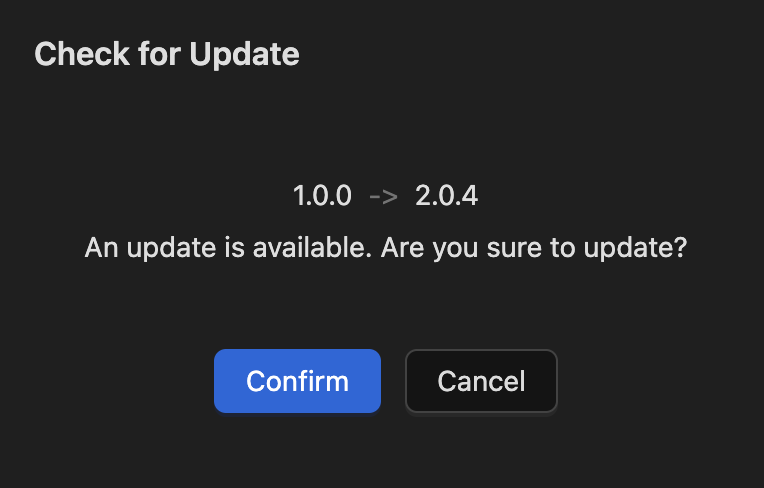
If there is an update available, click start update:
Wait for the application update to complete. The browser will automatically refresh and return to the login page. Log in again.
Update Complete
Congratulations! The image and application are now updated to the latest versions. You can now control the remote host by entering the NanoKVM's IP address in your browser.
