

 English
MaixCAM / MaixCAM-Pro Case
Overview
When you receive your MaixCAM, there are several accessories to pay attention to:
- Lens Cap: Protects the lens during transportation. Please remove it before use; otherwise, the screen will be black.
- Screen Protector: There is a plastic film on the screen to prevent scratches during transport. Please peel it off upon receipt, as it will significantly affect the viewing experience if left on.
- Manual Lens Focus: The lens supports manual focus. Gently rotate the lens to adjust the focus. If the image is blurry, it may be due to incorrect focus.
- Case: A 3D-printed case designed for easy handling and installation, while also adding aesthetic value.
Open Source Model Files
- MaixCAM Case Model (Recommended to use resin with a temperature resistance of 70°C for UV curing printing)
- MaixCAM Stand Model
- MaixCAM-Pro Case Model
- 6 x M2*5 self-tapping screws
- 1 x H1.5 Allen wrench
MaixCAM
MaixCAM Disassembly
It is strongly recommended to choose the version with the TF card pre-installed, as it is assembled at the factory and can be used directly without further disassembly.
The factory version comes pre-assembled. However, if you need to replace the TF card or solder pin headers, you can attempt to disassemble it.
Some points to note:
- Ensure the device is powered off before disassembly.
- There is a thermal pad between the CPU and the case. Be careful not to damage it during disassembly.
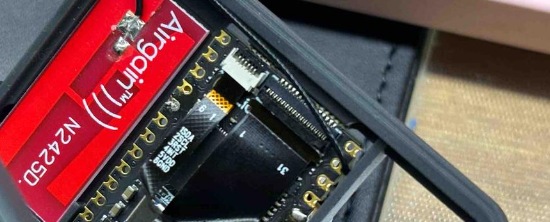
- Be cautious not to damage the camera, touch, or display ribbon cables (which can be loose). Do not bend the cables.
- Pay attention to the direction of the cables; do not insert them incorrectly.
Replacing the TF Card in MaixCAM
- Pry open the clips on both sides of the device to separate the front and back covers.
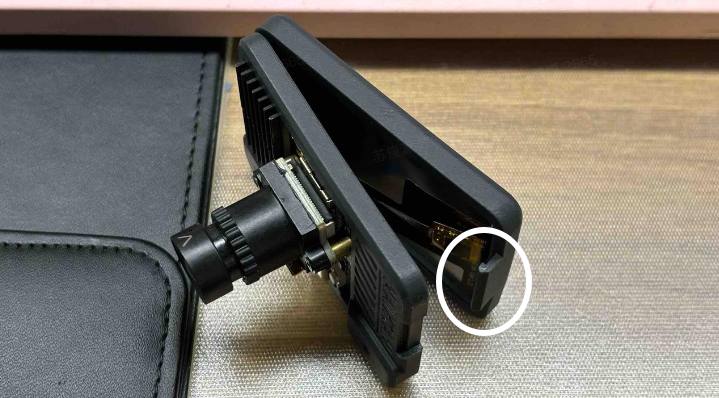
- Lift the shell holding the display to access the TF card.
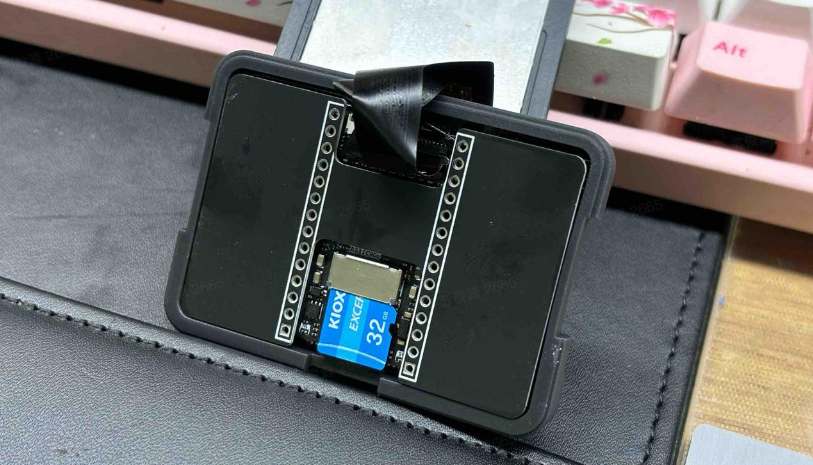
- Before reinstalling the display, ensure the display ribbon cable is properly connected. If it is misaligned, reconnect it correctly.
MaixCAM-Pro
For MaixCAM-Pro, disassembly is not recommended unless necessary.
- First, you will need a hex screwdriver.
- Unscrew the screws at the back to remove the rear panel.
- To remove the PCB, carefully lift the display by prying the gaps (be aware of the ribbon cables behind the display to avoid damaging them).
- You will see screws that hold the PCB in place. Once unscrewed, you can remove the PCB. If it is the battery version, the battery is located behind the display.
Note: Removing the display will cause the adhesive between the display and the case to lose its stickiness. You will need to reapply adhesive to secure it properly.
