English
Using as Serial Module
Update history
| Date | Version | Author | Update content |
|---|---|---|---|
| 2023-07-26 | v0.1 | ctx |
|
SLogic Combo 8 has 4 independent high-speed serial port functionalities. The first two ports based on UART can achieve a super-high speed baud rate of up to 20Mbps simultaneously, while the latter two ports can reach up to 1Mbps through IO simulation. It is highly suitable for scenarios such as batch programming and production testing.
Enable Serial Module Functionality
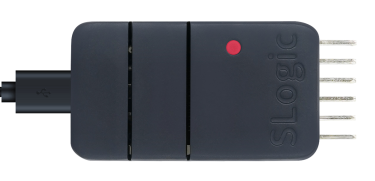
Press the toggle button to switch the indicator light to red.
To verify if Serial Module functionality is enabled:
Open the device manager in Windows environment, and use the lsusb command in Linux environment to find the "UARTx4 HS" device
Getting Started
Pin sequence
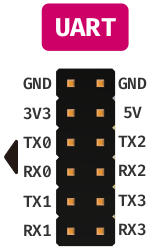
SLogic Combo 8 has a total of 4 serial ports. UART0 and UART1 support a maximum baud rate of 20M, while UART3 and UART4 support a maximum baud rate of 1M.
Note:
- Ensure that the module and the target device share a common ground to prevent issues such as garbled data.
- The device numbers on Windows may be in random order, so manual trial-and-error may be required to find the corresponding serial port.
Linux
Please note: Due to system reasons, Linux may consider the device as a modem when it has more than one ttyACM. This may temporarily occupy the device for sending AT commands. In this situation, you may not be able to open the serial port, and it may report "Resource busy" due to device being occupied. This is normal, and it will return to normal after a while. To solve this problem, you can add a udev rule to avoid this issue. Please refer to the following commands:
sudo touch /etc/udev/rules.d/49-sipeed.rules
sudo echo "ATTRS{idVendor}==\"359f\", ATTRS{idProduct}==\"3101\", ENV{ID_MM_DEVICE_IGNORE}=\"1\"" > /etc/udev/rules.d/49-sipeed.rules
sudo udevadm control --reload
Data Transmission and Reception
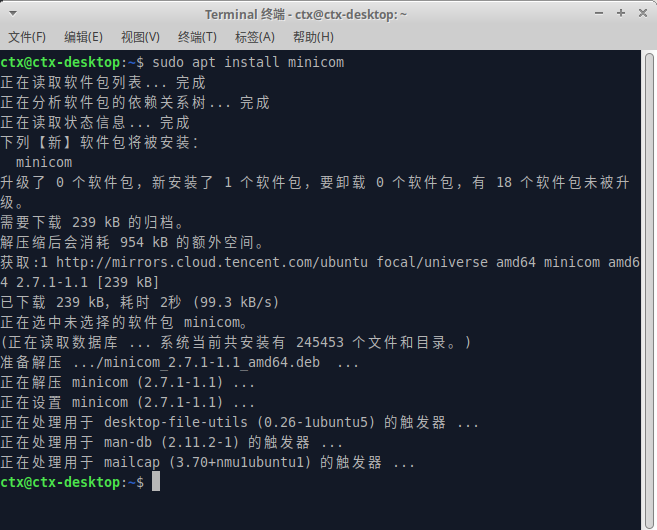
For Linux, you can use picocom or minicom as the serial communication tool. Install it using the following commands:
sudo apt install picocom
sudo apt install minicom
For example, to use minicom with UART0 to communicate with the test device, open the Linux terminal using CTRL+ALT+T, enter the installation commands, and enter the administrator user password when prompted. Wait for the package installation to complete.
After installation, communicate with the test device using UART0. In the terminal, enter the command:
sudo minicom -b 2000000 -D /dev/ttyACM0
The -b parameter specifies the desired baud rate, which should be the same as the UART baud rate setting of the test device.
The -D parameter specifies the port to listen to.
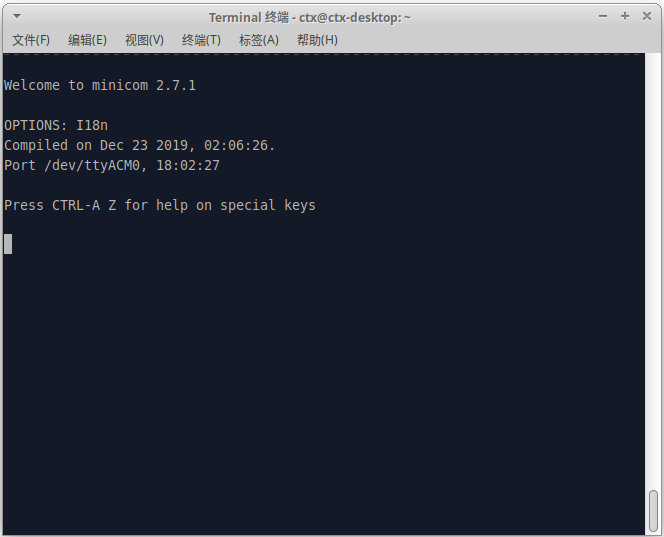
After entering the command, you can communicate with the test device, receive and print messages in the terminal, and send data to the test device.
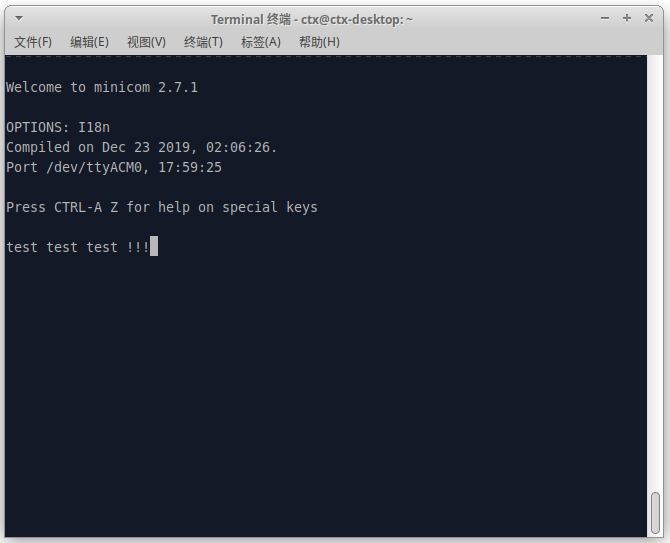
Serial Loopback Test:
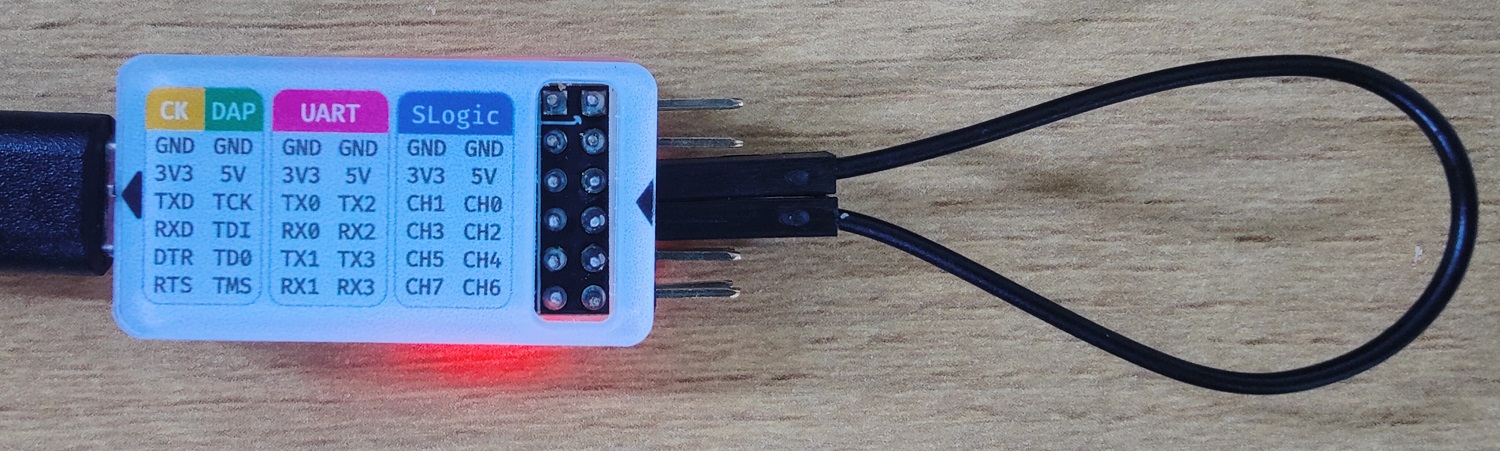
(Above: Serial module wiring diagram)
Loopback test result:
Windows
In the Windows operating system, you can use tools like SSCOM, MobaXterm, and others as serial port communication tools. Here, we'll use SSCOM as an example to demonstrate how to perform serial communication tests.
First, download SSCOM. This software is open source, so please search and download it via an online search.
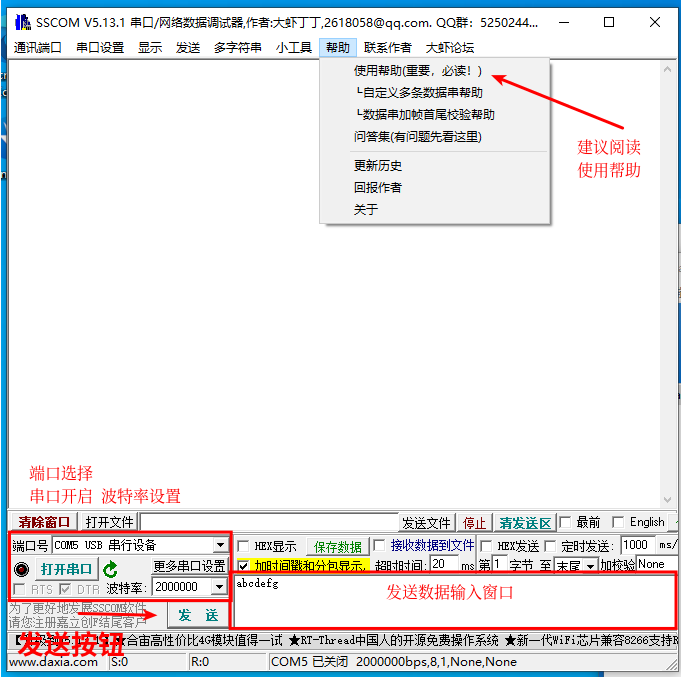
After the download is complete, extract and launch the serial port tool. You will see the following interface:
Connect the module to your PC. Then, in the Windows Device Manager (shortcut
Win + X + M), check if the connection was successful and obtain the port number information.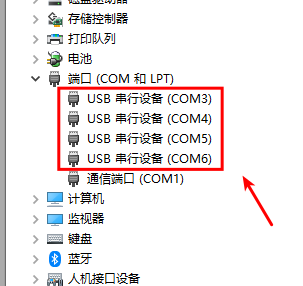
Due to the nature of Windows systems, the port numbers might be in a disordered sequence. Therefore, you can follow these steps to test the corresponding port numbers:
- Connect the TX* and RX* pins of the module (* can be 0-3).
- Set the baud rate, typically using 115200.
- Open the serial port.
- Sequentially try different port device numbers, click the "Send" button, and check if data is received to confirm the corresponding serial port for each.
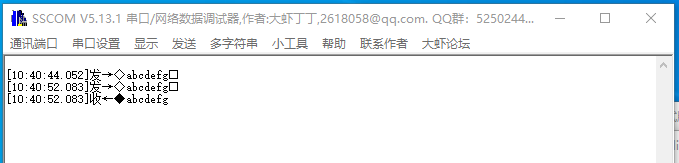
After confirming the port numbers for each serial port, you can input the data you want to send in the data input window. Simultaneously, received data will also be displayed in the window.
Transmission and Reception Testing
Using the SLogic 4xUART module for serial communication testing, the first two virtual serial ports can achieve a maximum speed of 20Mbps. Here's an example of testing performance using SSCOM.
1Mbps Test (256kbps, 512kbps)
- Connect TX2 and RX3.
- Start two instances of SSCOM, connecting them to the respective serial ports.
- Set the baud rate to 1000000 and open the serial port.
- Create a 256KB text file with repetitive common characters.
- Use SSCOM's file sending feature, select the newly created text file and send it.
- The other instance of SSCOM will receive the data and verify the received file content.
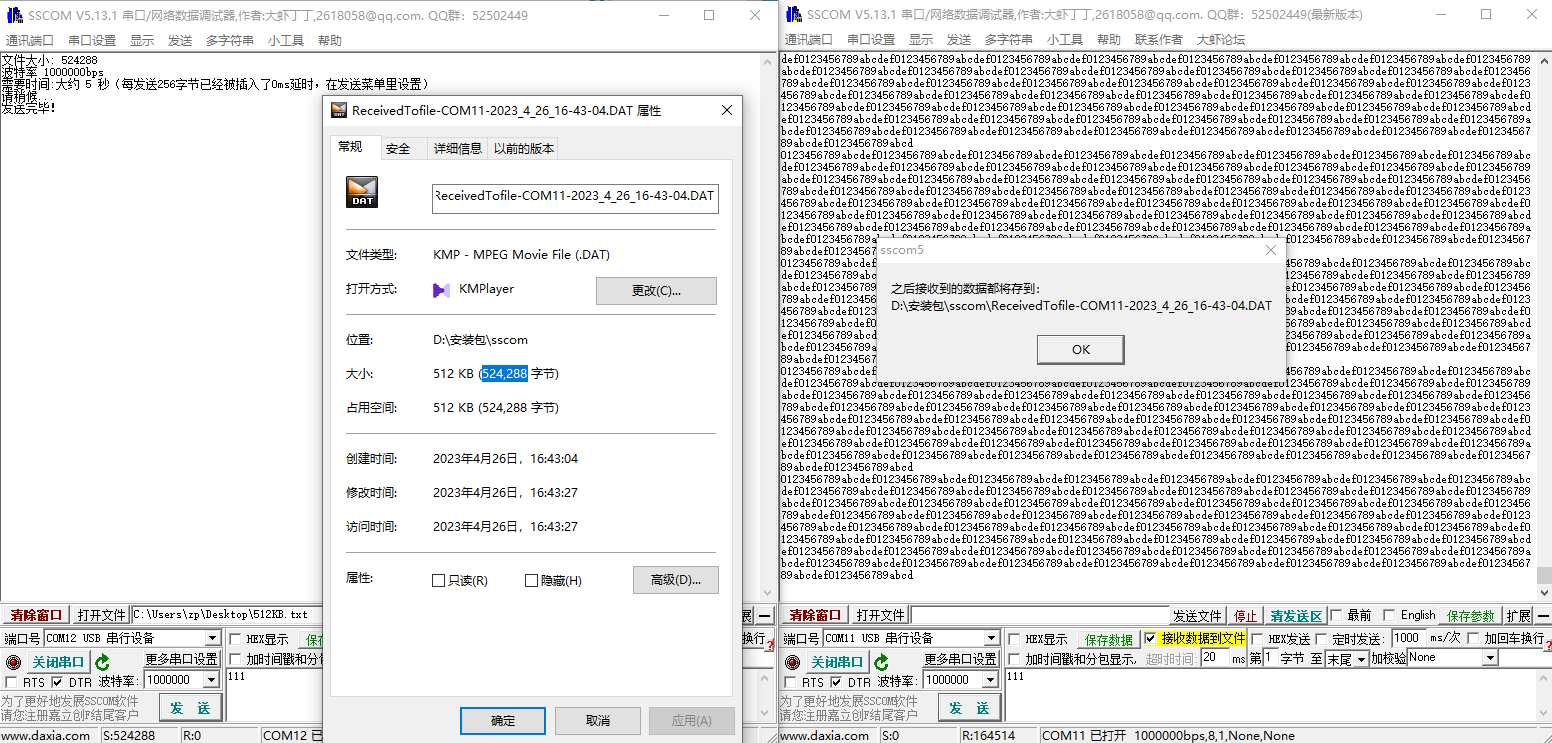
Below is the result of the 1Mbps test (256KB). Confirm the success of the test by checking the file size and data content.

Increase the data size of the text file to 512KB and repeat the test to confirm the success of sending and receiving 512KB of data at 1Mbps.
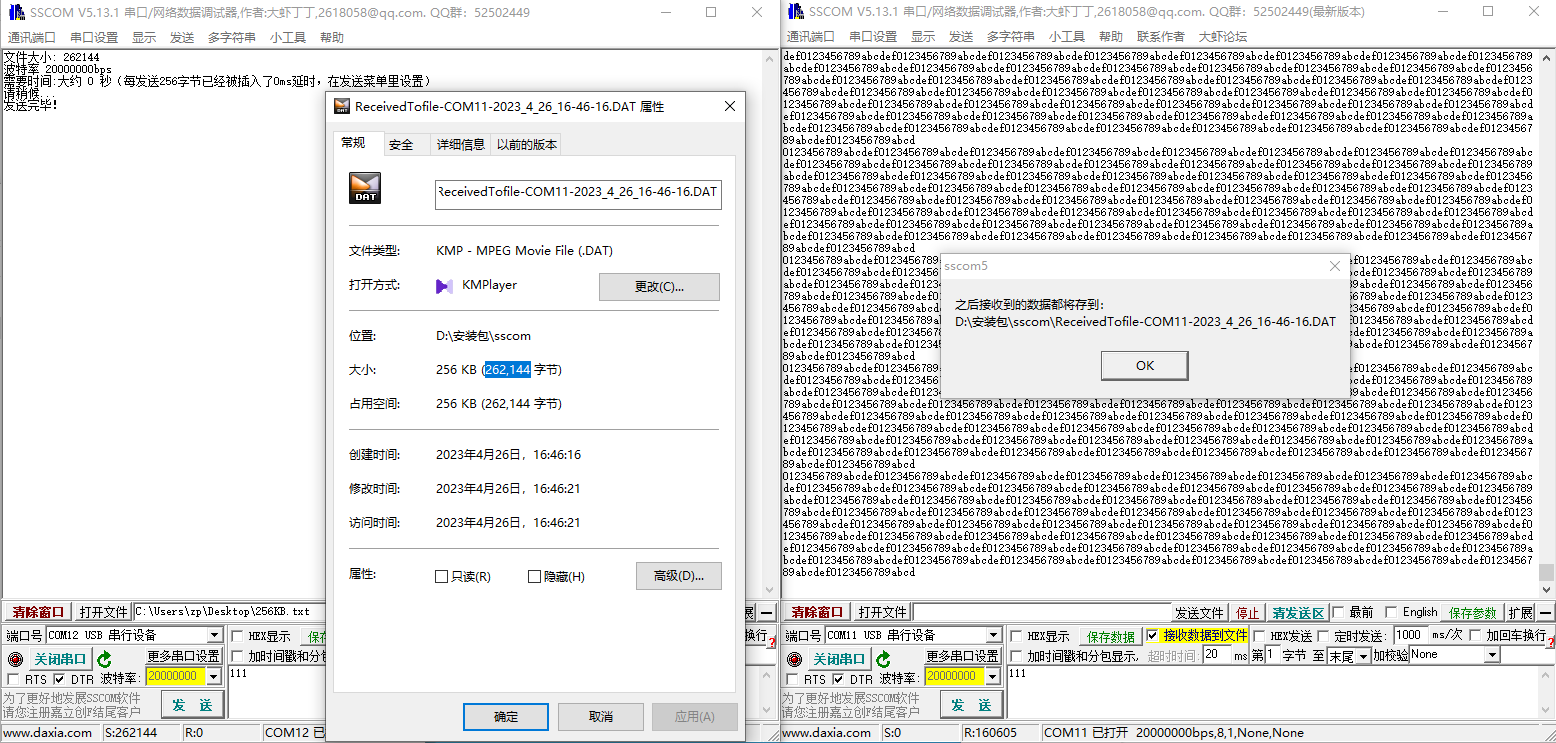
20Mbps Test (256kbps)
- Connect TX0 and RX1.
- Start two instances of SSCOM, connecting them to the respective serial ports.
- Set the baud rate to 20000000 and open the serial port.
- Create a 256KB text file with repetitive common characters.
- Use SSCOM's file sending feature, select the newly created text file and send it.
- The other instance of SSCOM will receive the data and verify the received file content.
Below is a screenshot of the test results. Confirm the success of the test by checking the file size and data content.