

 English
User Guide
Update history
| Date | Version | Author | Update content |
|---|---|---|---|
| 2024/8/14 | v1.1 | BuGu |
|
| 2024/7/4 | v0.1 | BuGu |
|
| 2024/12/11 | v1.2 | BuGu |
|
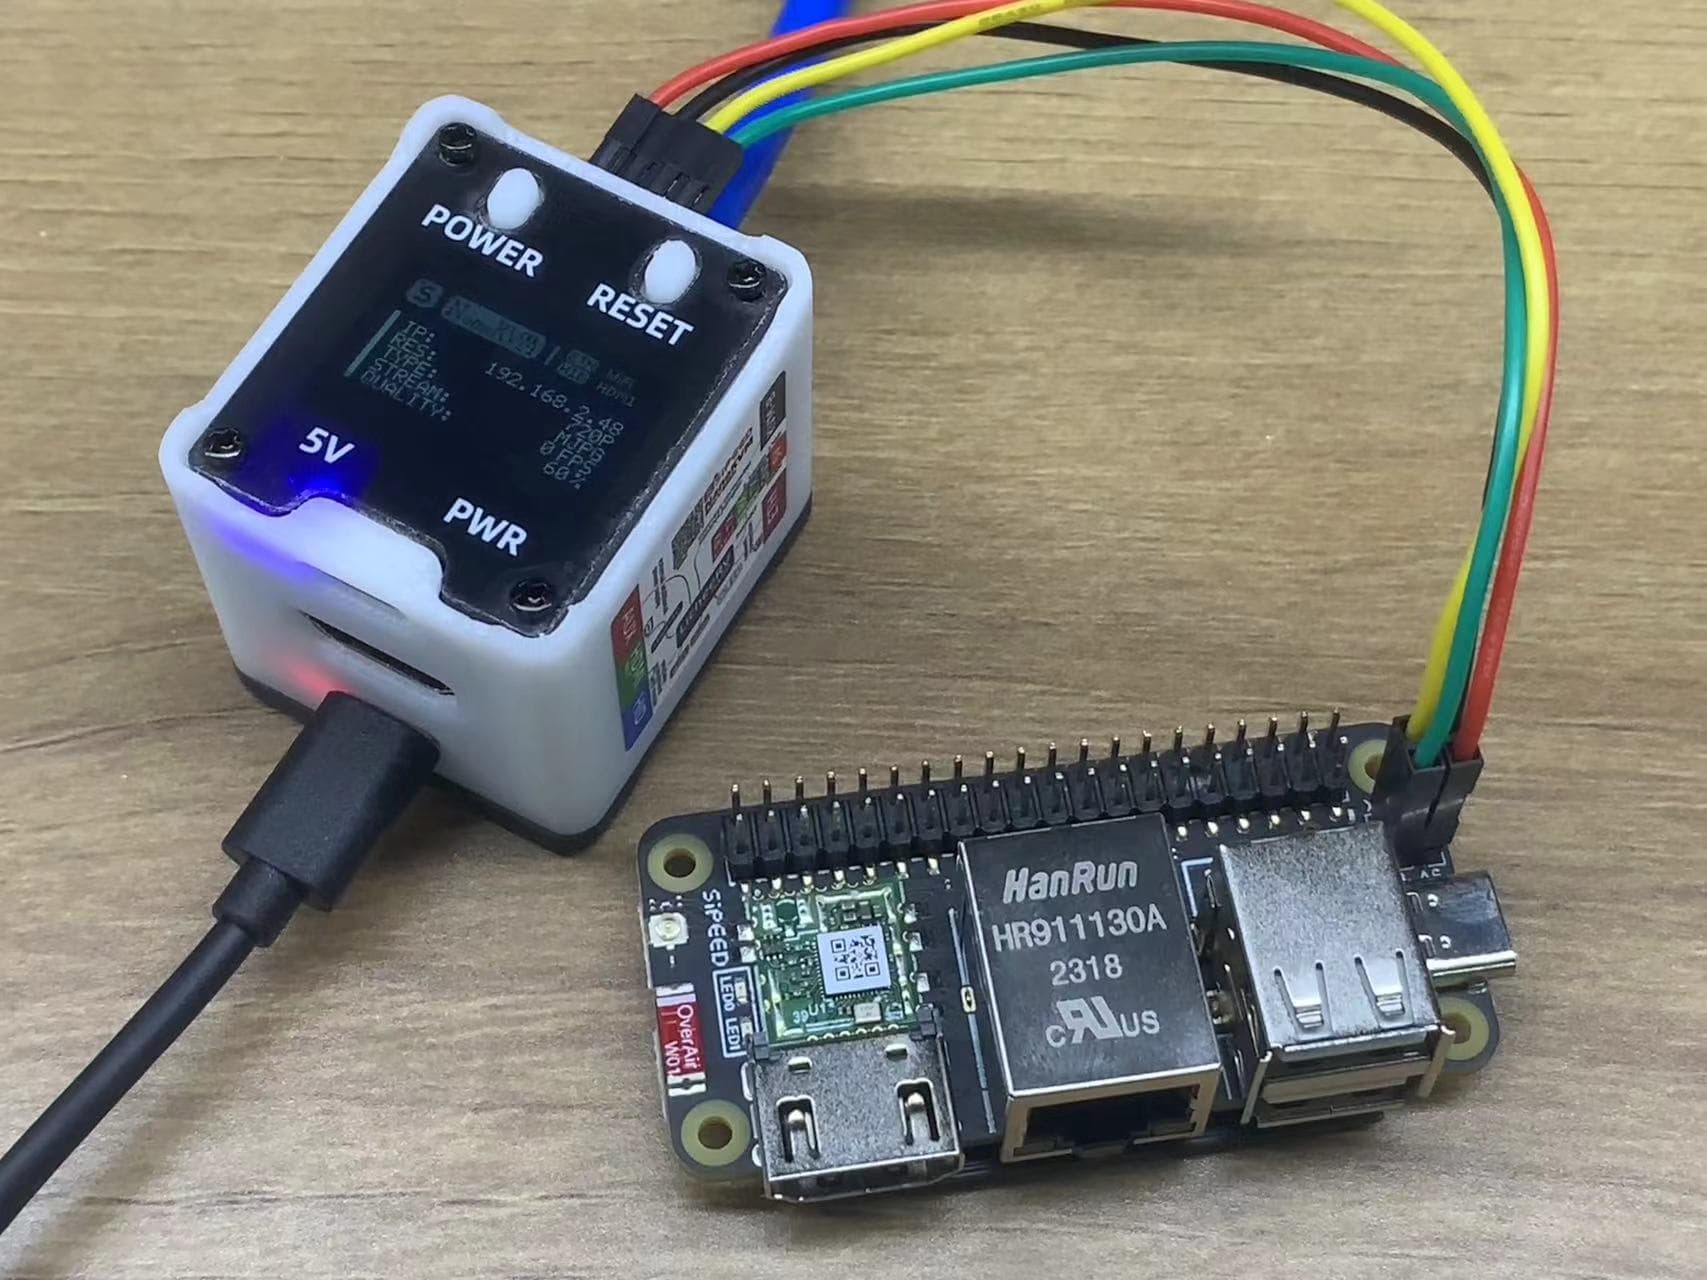
OLED Interface
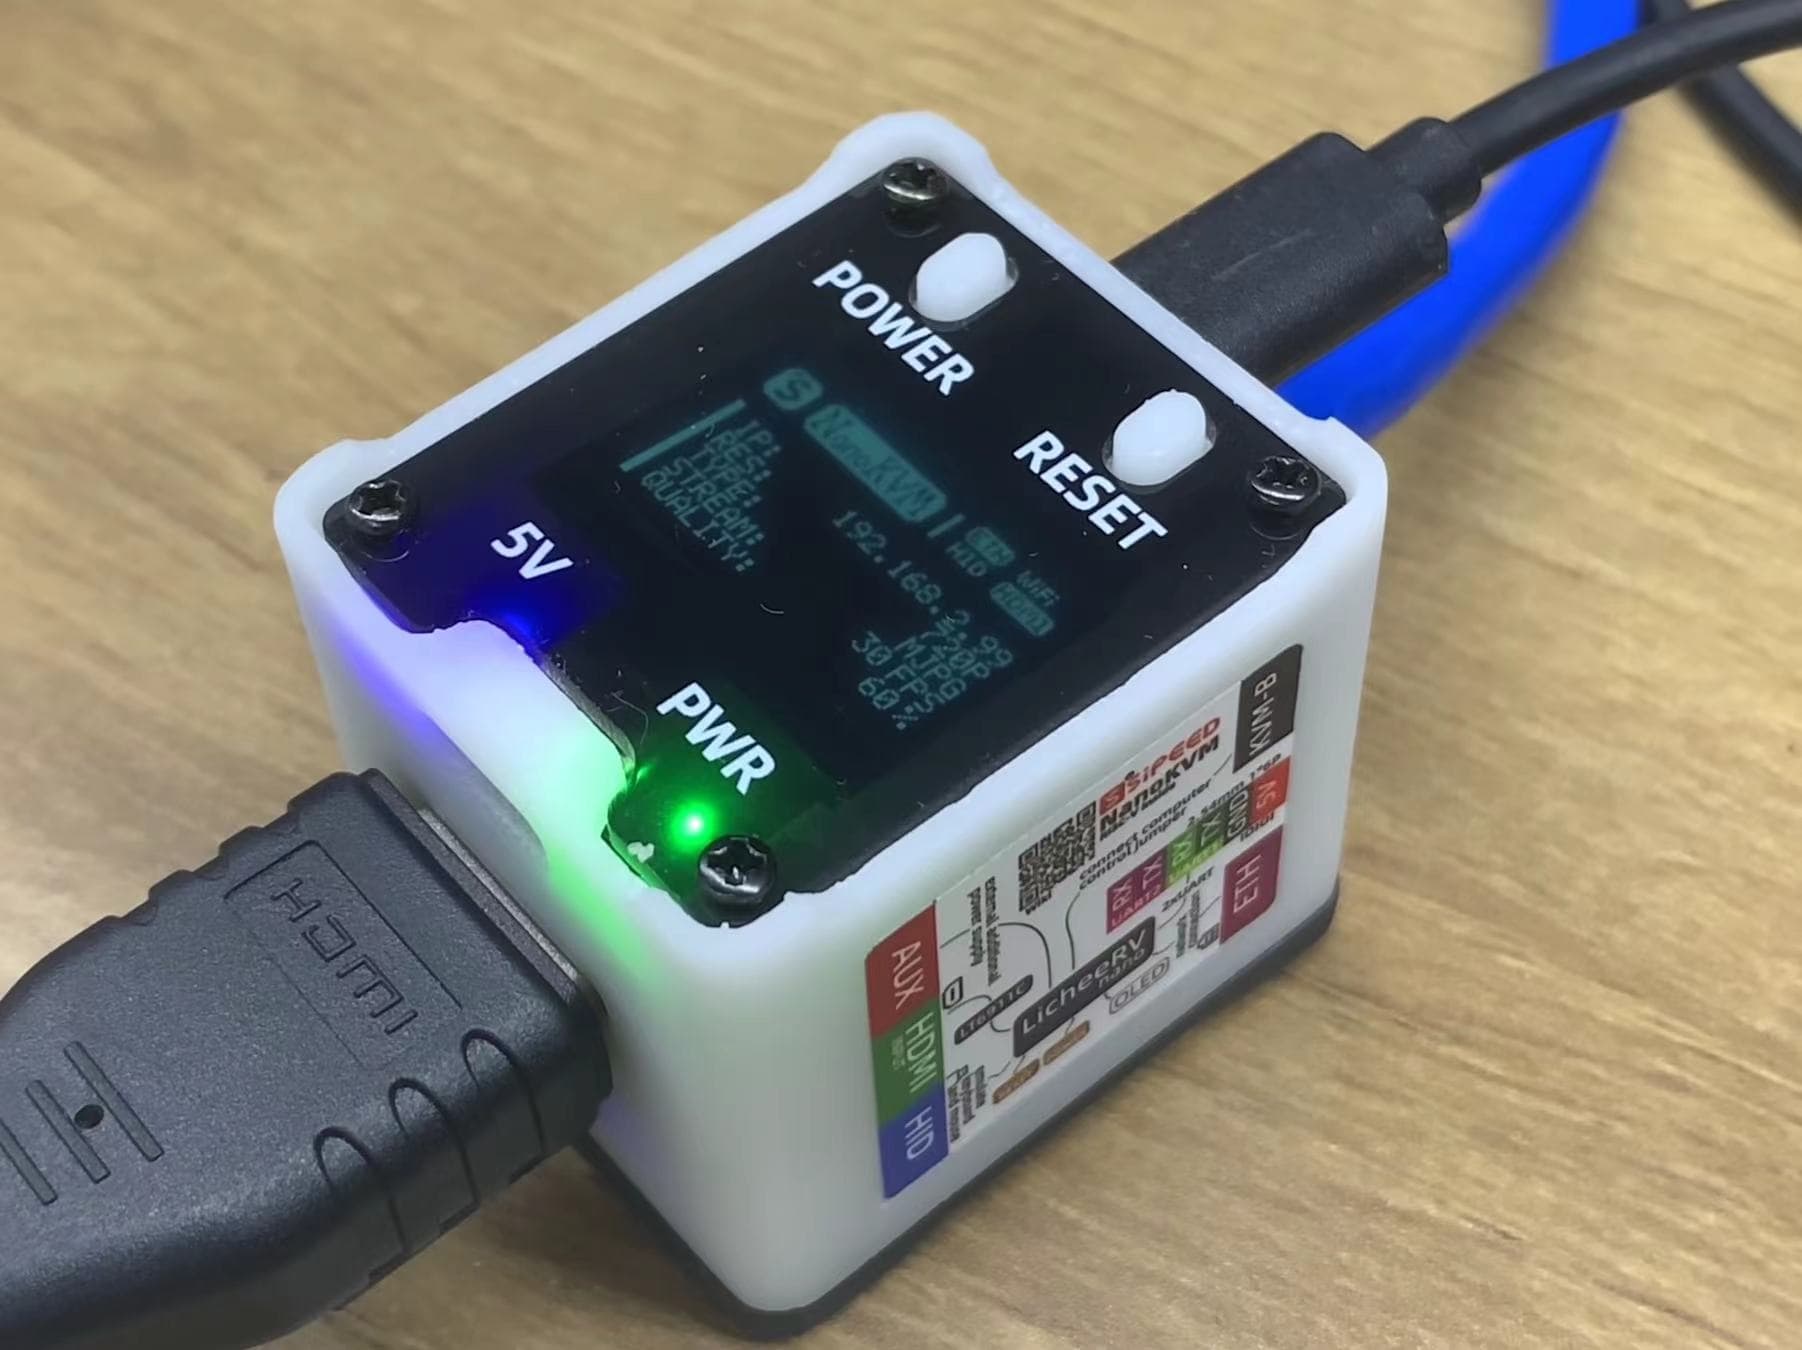
- Displays the connection status of Ethernet, USB, and HDMI. Icons will invert color when connected.
- IP: When Ethernet is connected, NanoKVM will automatically obtain an IP and display it on the OLED. If the gateway is unreachable, a
!will be displayed before the IP. - RES: Shows the current transmission resolution, default is 720P.
- TYPE: Displays the transmission type, currently only supports MJPG, H264 is under development.
- STREAM: Shows the real-time transmission frame rate. Frame difference detection is enabled by default (transmission stops when the screen is static). When the screen is static, FPS shows 0.
- QUALITY: Shows compression quality, ranging from 50-100%, default is 80%.
- The main interface provides an OLED sleep function to prevent screen burn-in; a short press of the BOOT button can turn the OLED off or on.
- After applying version
2.1.4, the OLED automatic sleep feature has been added: After setting the sleep time in the settings, the OLED will automatically enter sleep mode after the specified time. Pressing the BOOT button can temporarily wake up the OLED.
Management Page Features
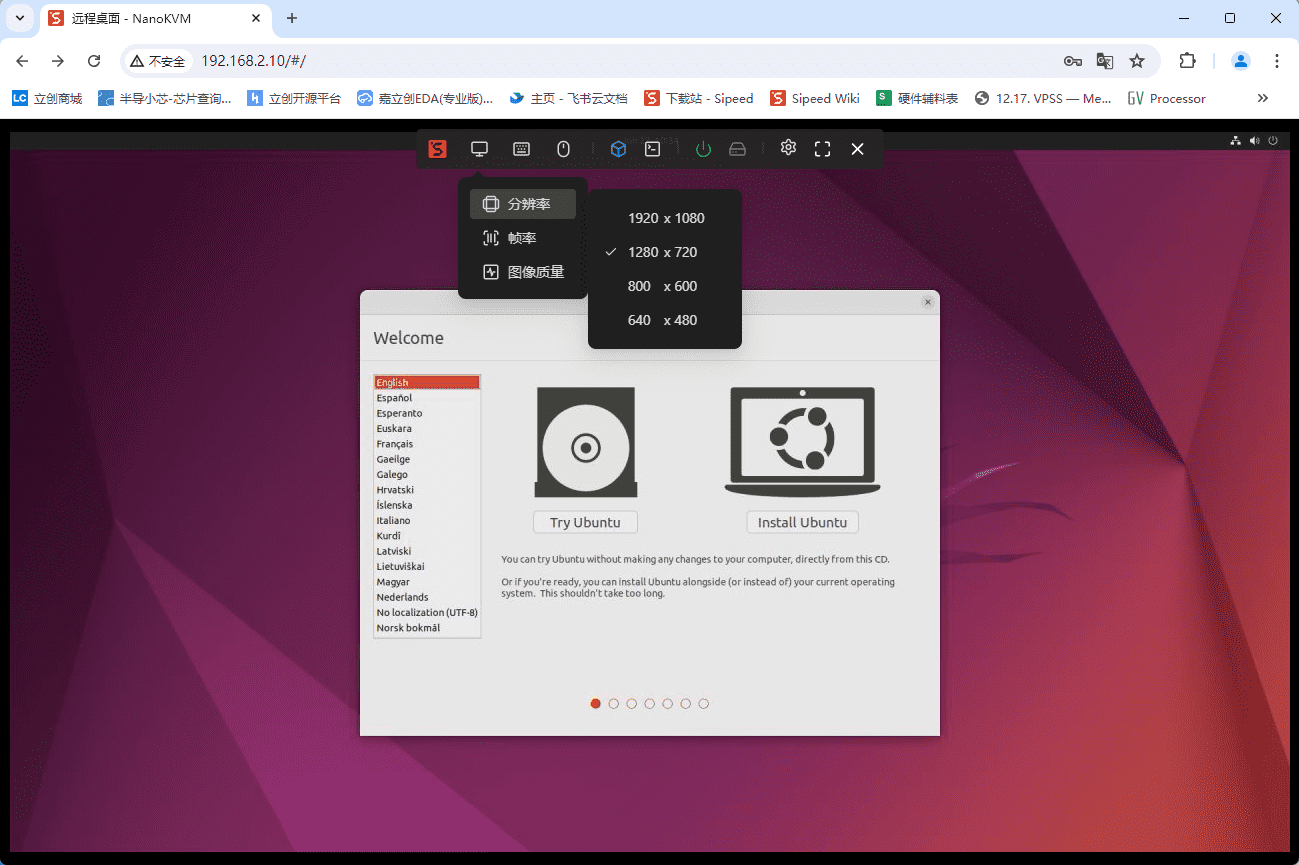
The floating toolbar from left to right includes: Image Settings, On-Screen Keyboard, Mouse Style, Image Mounting, Custom Scripts, KVM Web Terminal, WOL, ATX Control/Indicator, Settings, Full Screen, and Hide Floating Toolbar.
Resolution, Frame Rate, and Image Quality Settings
NanoKVM supports 1080P, 720P, 600P, and 480P image transmission. Different resolutions can be selected in Image Settings -> Resolution. Higher resolutions use more bandwidth and lower real-time frame rates.
- Note: This only changes the transmitted image size, not the HDMI input image size. To change that, please go to the host system's settings menu.
The Frame Rate setting option is used to modify the maximum transmission frame rate, which can limit network bandwidth usage. However, lower frame rates result in choppier images. Configure according to network conditions. Full version users can see the real-time video frame rate on the OLED.
The Image Quality option can modify the compression ratio. If the image appears choppy or has high latency, you can reduce the image quality.
Frame Difference Detection
- NanoKVM enables frame difference detection by default, stopping image transmission when the screen is static to save bandwidth.
- This feature uses approximately 2.5% of CPU resources, with a 0.2s delay from static to dynamic images. Click
Display->Frame Difference Detectionto disable or enable this feature.
Virtual Keyboard and Mouse Usage
- The USB port of NanoKVM simulates keyboard and mouse devices. Once the browser page is opened, the system will automatically capture keyboard and mouse input and sync operations to the host connected to NanoKVM in real time. Users can choose to hide the mouse or change its display style on the screen.
- For users who find it inconvenient to use a keyboard, we provide an on-screen keyboard. Click the keyboard icon on the floating toolbar to bring up the on-screen keyboard.
ISO Image Mounting and Remote Installation
Besides simulating keyboard and mouse devices, the USB-C port of NanoKVM also simulates a USB drive, mounting part of the TF card's storage space for installation needs. This USB drive is formatted as exFAT by default. The Full version NanoKVM has a built-in TF card with approximately 21GB of storage for the simulated USB drive.
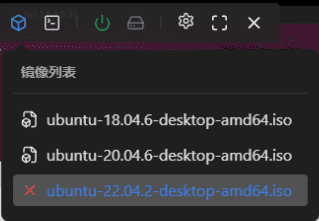
Unlike a regular USB drive, NanoKVM's virtual USB drive can store multiple images simultaneously. Before starting, users can select the system image to be installed through the web page options.
Users need to download the installation images (usually ending in .iso) in advance, insert NanoKVM USB-C into the computer, and copy the downloaded images directly into the USB drive (multiple systems can be copied). Then, disconnect it.
Connect the remote host to NanoKVM as described above, log in to the system via the browser, click the CD icon, and select the system to be installed for ISO mounting.
Next, start the installation process by clicking Power On (Short Press) and quickly pressing the F11 key on the keyboard (keys may vary by host, refer to the host manual), select the corresponding image to boot and complete the installation process.
Note:
- The virtual USB drive feature is enabled by default. If not needed, it can be disabled by clicking
Settings->Virtual USB Drive. - Please eject the original 21G virtual USB flash drive on the host before mounting the image to avoid data loss.
- The virtual USB drive can also be used as a regular USB drive. If no image is selected in the web interface, the entire 21GB virtual USB drive will be mounted by default.
- Users can also use the conventional card burning method to burn images, though it's not recommended.
- The speed of copying images to NanoKVM is limited by USB2.0 transfer speed and SG2002 card writing speed, which may be slow. Users can remove the TF card, insert it into the computer, unlock the hidden third partition of the TF card, and directly copy the images into it.
- The virtual USB drive is also mounted to the
/datadirectory of NanoKVM, allowing users to read and write to this partition directly from the NanoKVM terminal. - Canceling the virtual USB flash drive operation in the settings will force the USB flash drive to eject the USB flash drive, please eject the USB flash drive safely before setting it up to avoid data loss.
Web Terminal
- By clicking the
Terminal->NanoKVM Terminalicon on the floating toolbar, users can open the web terminal and access the NanoKVM system directly without SSH. - When NanoKVM reconnects after a network disconnection or system reboot, the web terminal will prompt for re-login. The username is
rootand the password isroot.
Serial Terminal
NanoKVM is built on the LicheeRV Nano, which has 3 UART ports. UART0 is used for system log output by default. In the Full version of NanoKVM, UART1/2 are exposed, allowing users to expand functionality (the first batch of beta versions have holes in the shell for this purpose).
Click Terminal on the management page, select Serial Terminal, choose the serial port to use, enter the baud rate, and click Start to use it.
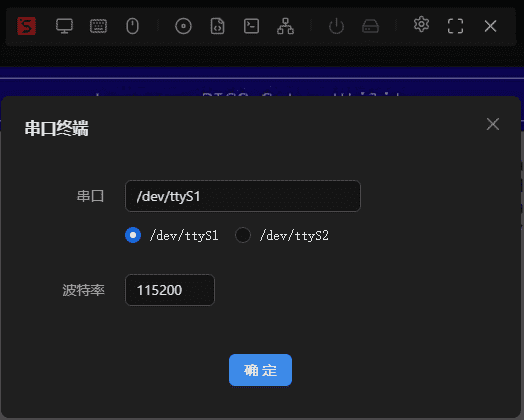
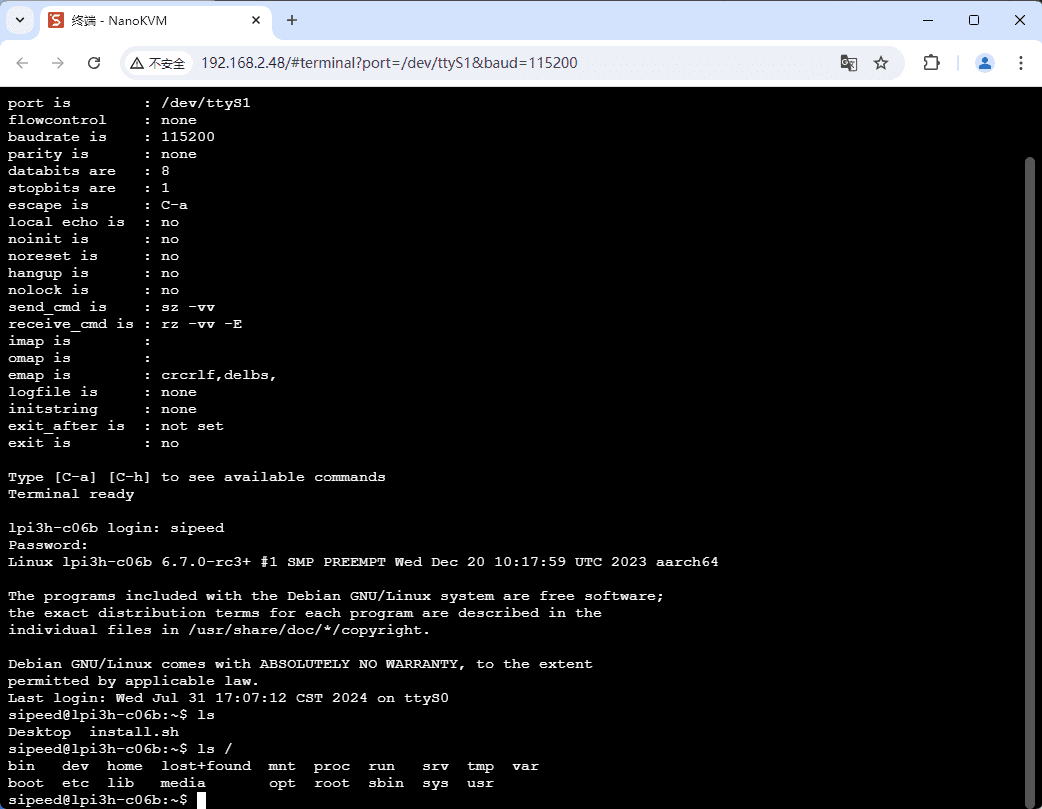
Note: The serial terminal feature uses WebSSH + picocom, and the usage is similar to picocom.
RNDIS
NanoKVM's USB will default to simulate an RNDIS USB network card (slave device), which can be used for system maintenance when the NanoKVM service is abnormal. Refer to here to connect to a computer, and explore more usages yourself.
If you do not use the RNDIS feature, it can be disabled by clicking Settings -> RNDIS.
Note: The NCM connection method was added after version 2.1.5, but the default remains RNDIS. To enable it, use: touch /boot/usb.ncm or create an empty file named usb.ncm in the /boot partition.
ATX Power Control
- On the right side of the floating toolbar, there are power and hard disk icons. Normally, they are gray. After powering on, the power icon turns green.
- Click the power icon to see the reset button and power button (long/short press).
- The Full version ATX control board is limited by the number of extension lines, only the power, reset buttons, and power light are exposed, so it is normal for the HDD LED to not light up. Lite users can extend functionality according to the schematic.
Note:
- The official version of NanoKVM-A hardware reserves pins for the WiFi module and modifies the OLED and some ATX pins. The firmware will automatically detect the hardware version and adapt.
- The Lite version of NanoKVM does not include NanoKVM-A/B, and the firmware will directly recognize it as the official version.
Settings
- Switch between Chinese and English.
- About NanoKVM: Click to open the Wiki.
- Check for updates: When updates are available, users can click to update. The web page will automatically refresh and re-login after about 15 seconds to complete the update.
- Version 2.2.5 introduces a preview update feature. Enable this option to pull the latest preview version.
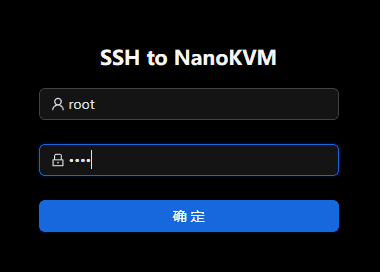
About SSH
In version 2.1.6 and later, SSH can be enabled or permanently disabled from the web interface under Settings -> Devices -> SSH.
In version 1.4.0, SSH is disabled by default.
- Permanently Disable: Execute
touch /etc/kvm/ssh_stopto disable SSH login on the next boot. To enable it again, remove the file usingrm /etc/kvm/ssh_stop. - Temporarily Enable: Execute
touch /boot/start_ssh_onceor create an empty file namedstart_ssh_oncein the /boot partition. This will enable SSH on the next boot, and the file will be automatically deleted.
Setting DNS
- If you need to set a DNS list, create
/boot/resolv.conf. This will enforce your own DNS configuration after booting. - NanoKVM will automatically read the DNS configuration from
/boot/resolv.confduring startup. If/boot/resolv.confdoes not exist or is empty, the default DNS configuration will be used. - Recommended DNS servers:
nameserver 119.29.29.29     # Tencent Cloud DNS
nameserver 182.254.116.116  # Tencent Cloud DNS
nameserver 223.5.5.5        # Aliyun DNS
nameserver 223.6.6.6        # Aliyun DNS
nameserver 8.8.8.8          # Google DNS
nameserver 8.8.4.4          # Google DNS
nameserver 1.1.1.1          # Cloudflare DNS
nameserver 1.0.0.1          # Cloudflare DNS
About mDNS
mDNS (Multicast DNS) is a protocol used for name resolution within a local network, allowing devices to discover and communicate with each other using hostnames instead of IP addresses. It enables automatic discovery of services and devices on the network without a central DNS server.
NanoKVM generates mDNS hostnames based on the device code to minimize conflicts when multiple devices are present.
The device name for NanoKVM can be modified in the settings and will take effect after a restart.
mDNS services can lead to higher CPU usage in complex network environments, affecting image smoothness. It is recommended to disable it when not in use: Settings -> Devices -> mDNS.
About the Watchdog
- The watchdog system was added in version 2.2.2 to continuously monitor the server service. If the service encounters an exception, the system will restart. By default, it is disabled. You can enable it by executing
touch /etc/kvm/watchdogin the web terminal and disable it withrm /etc/kvm/watchdog.
More Features Coming Soon!
Network Latency Estimation
Connect the host to KVM and a regular screen, play a stopwatch video, capture the remote desktop and display screen, and calculate the difference to estimate network latency.
Hardware and Structure
Disassembly
Full version NanoKVM requires disassembly for re-flashing the card. Follow the steps below to disassemble the shell.
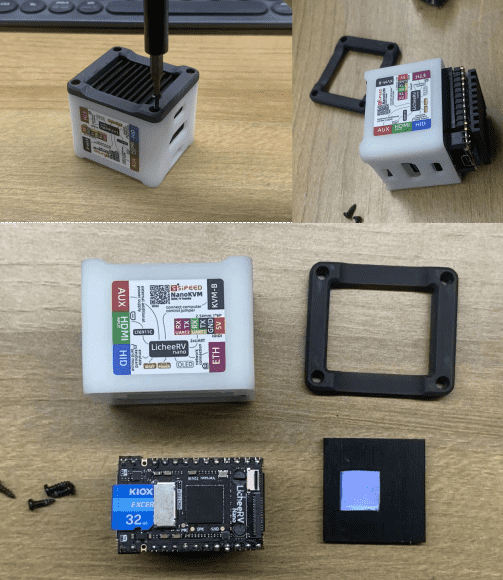
- Remove the 4 screws at the bottom.
- Push the NanoKVM out of the shell using the HDMI and Ethernet ports.
- Remove the heatsink to pull out the TF card.
Differences Between Beta and Official Versions
The official version hardware reserves pins for the WiFi module and modifies the OLED and ATX pin allocations as shown below.
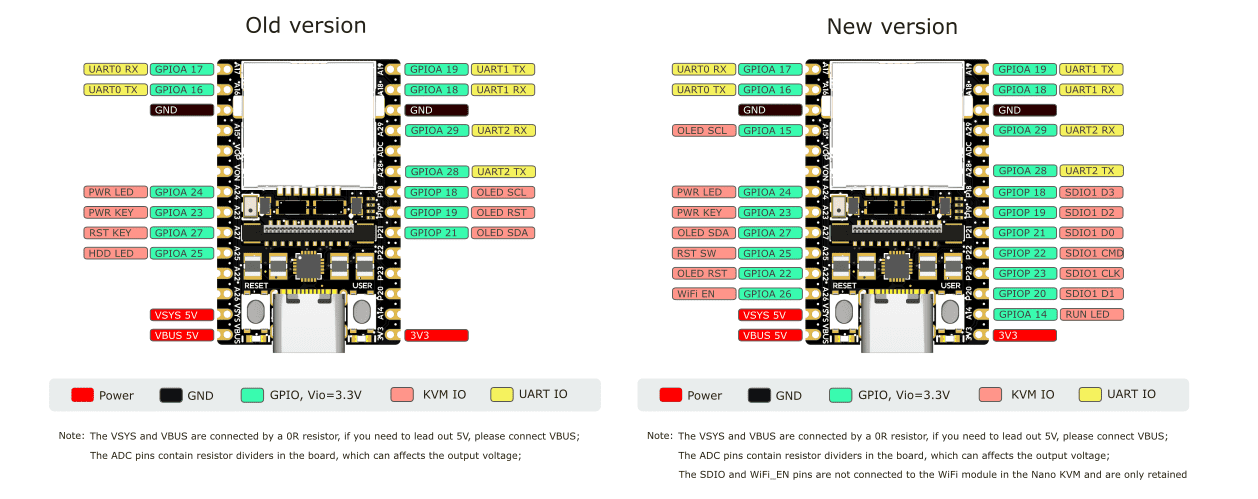
To ensure compatibility with both hardware versions, the software has been designed with adaptive features. Beta users and official version users can update with confidence.
ATX Wiring:

NanoKVM Full version comes with an integrated ATX control board. Beta users can add the ATX extension board to the Lite version.
The official firmware for NanoKVM Full version is universal and compatible with all versions. The ATX control interface supports configurations for power light, hard disk light, reset, and power buttons. Refer to the wiring diagram for assembly.
For Lite version users, the software adapts to their board, and there's no hardware auto-detection feature. If users need ATX support, they can manually update the firmware to the Full version and add the necessary hardware extensions.
Firmware and Software Updates
Firmware Update
Updating the firmware requires disassembling the Full version NanoKVM. For Lite version users, follow these steps to update:
- Visit the official NanoKVM website to download the latest firmware.
- Power off the NanoKVM and remove the TF card.
- Connect the TF card to your computer using a card reader.
- Copy the downloaded firmware to the root directory of the TF card.
- Reinsert the TF card into NanoKVM, reassemble, and power it on.
- The NanoKVM will automatically update the firmware.
Software Update
Users can check for software updates via the NanoKVM management page:
- Open the NanoKVM management page in a browser.
- Click
Settings->Check for Updates. - If an update is available, click
Updateto begin the process. - The page will refresh and re-login after about 15 seconds to complete the update.
Troubleshooting
- If the update process fails, try restarting NanoKVM and repeating the steps.
- Ensure a stable network connection during the update.
- For persistent issues, contact NanoKVM support for assistance.
Contact and Support
For further assistance and support, visit the NanoKVM official website or join the community forums to connect with other users and developers.
Note: The TF card described in this article is a microSD card
End of User Guide.
