


 English
 Translate
Flash Image
NanoKVM Go is usually shipped with an image already flashed. If the device boots normally, you can skip this step at first.
Preparation
Before flashing, prepare the following items:
- NanoKVM Go;
- a SIM eject pin or another tool that can press and hold the flashing-mode button;
- a USB data cable;
- a Linux / macOS / Windows computer;
- the NanoKVM Go image file;
- the balenaEtcher flashing tool.
Download the Image
Download the latest NanoKVM Go image from GitHub.
Image download link: NanoKVM-Go Releases
Download the Flashing Tool
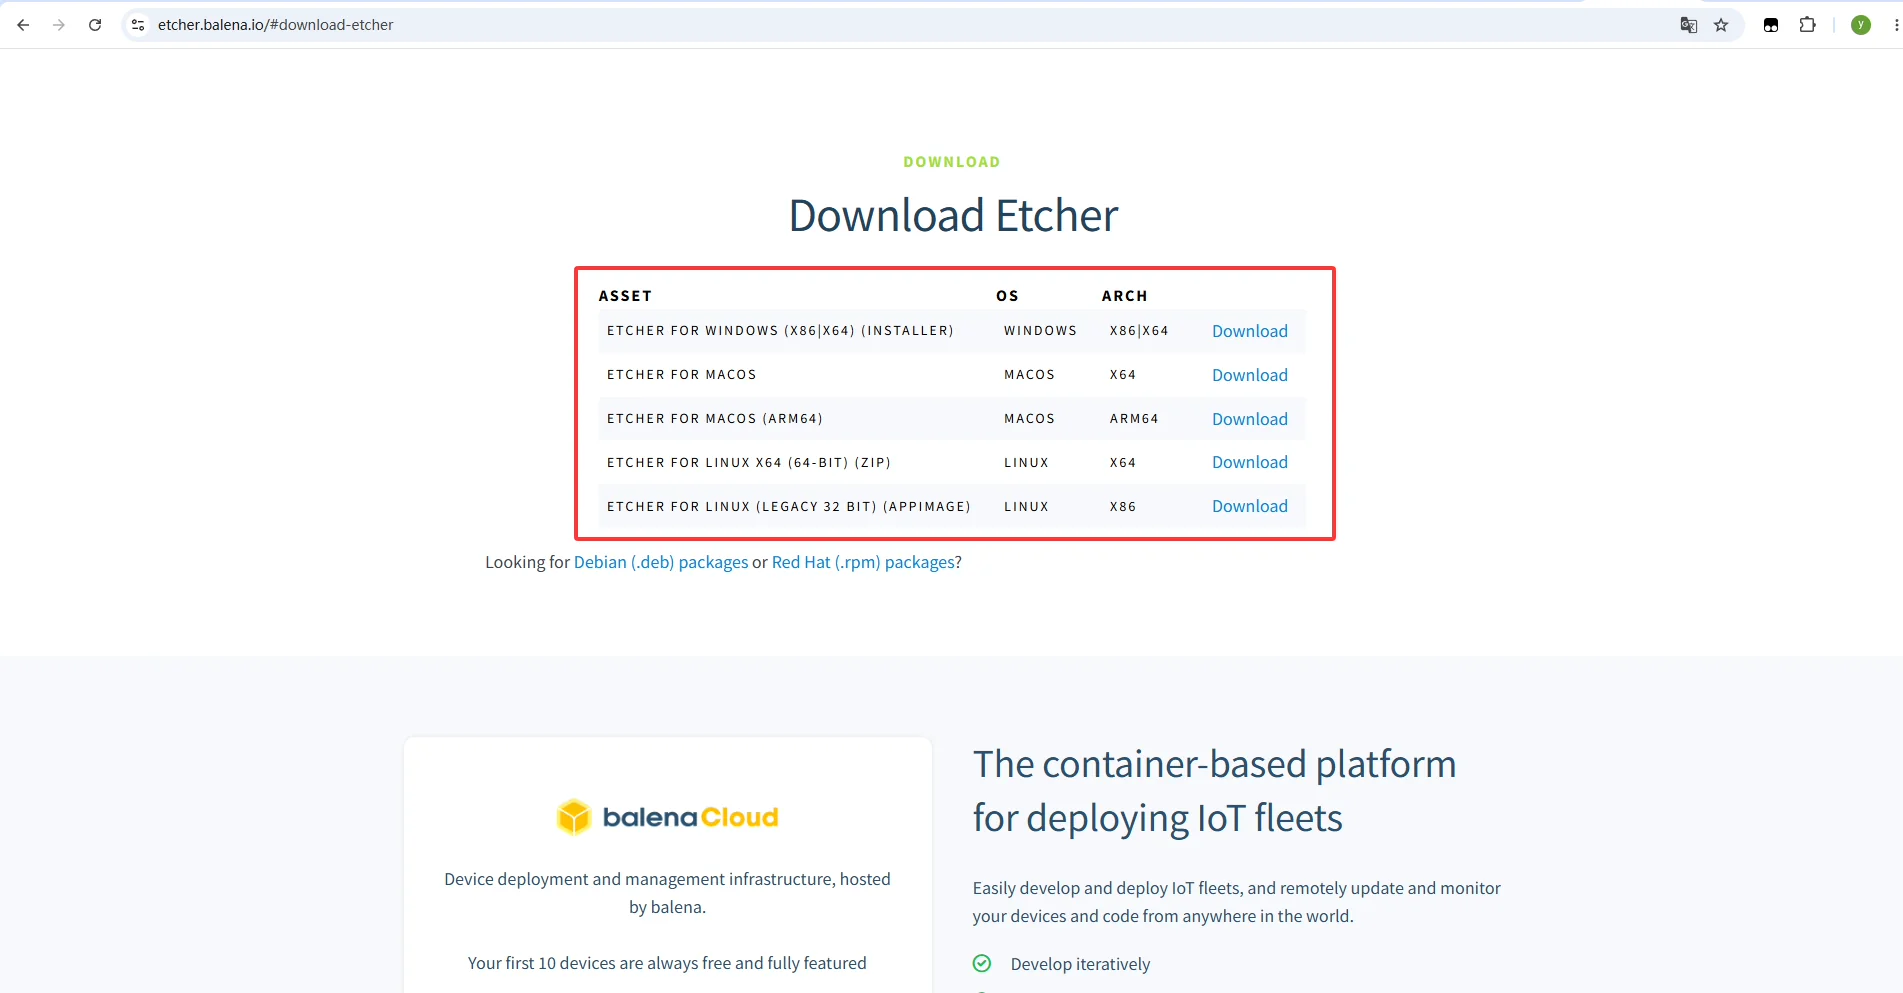
Download and install balenaEtcher.
Enter Flashing Mode
Disconnect the USB cable from NanoKVM Go to power off the device.
Open balenaEtcher on the computer.
Insert the SIM eject pin through the opening and press and hold the flashing-mode button on NanoKVM Go.
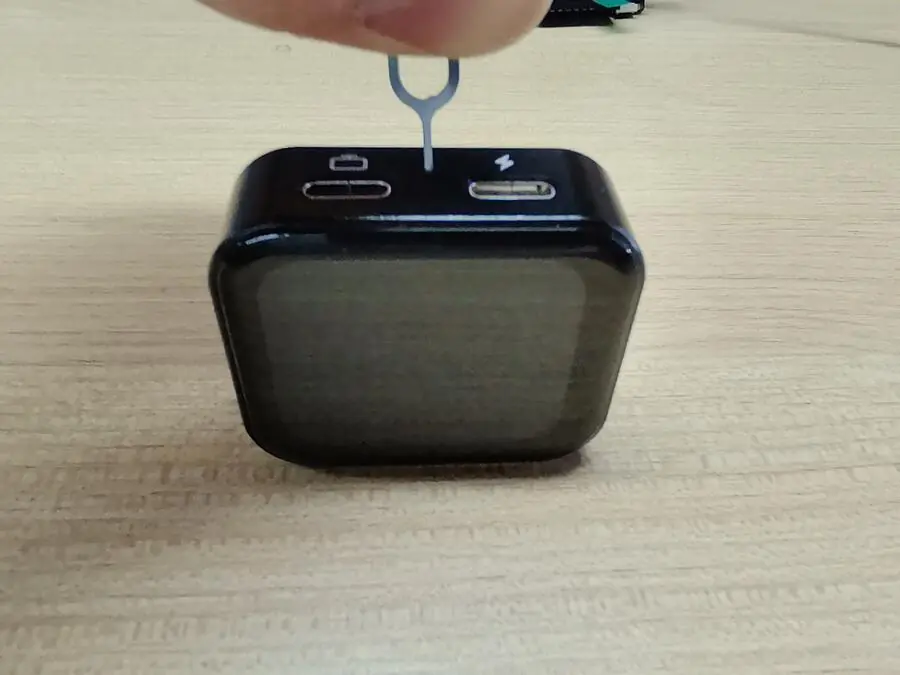
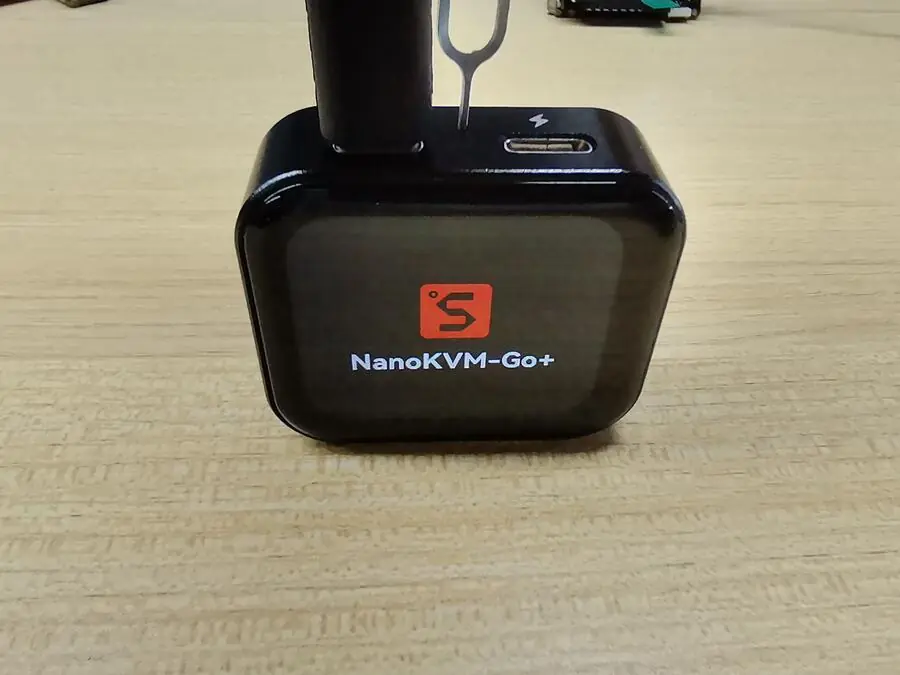
- Keep holding the flashing-mode button, insert the USB data cable connected to the computer into the NanoKVM Go data port (Data Port).
- Confirm that the computer detects the NanoKVM Go device. It appears as a USB drive in This PC.
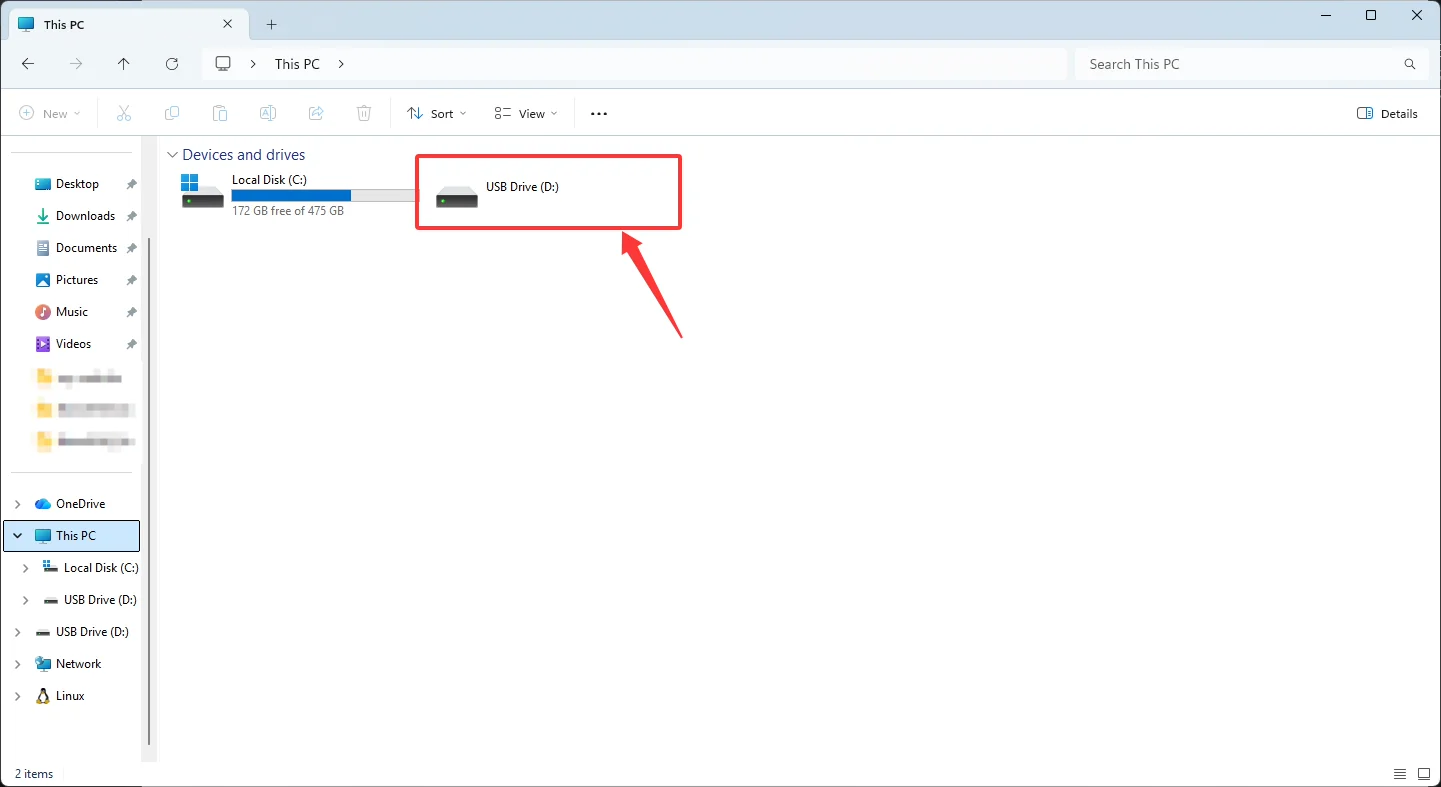
- Release the flashing-mode button after the device is detected.
Flash the Image with balenaEtcher
- In balenaEtcher, click
Flash from fileand select the downloaded NanoKVM Go image.
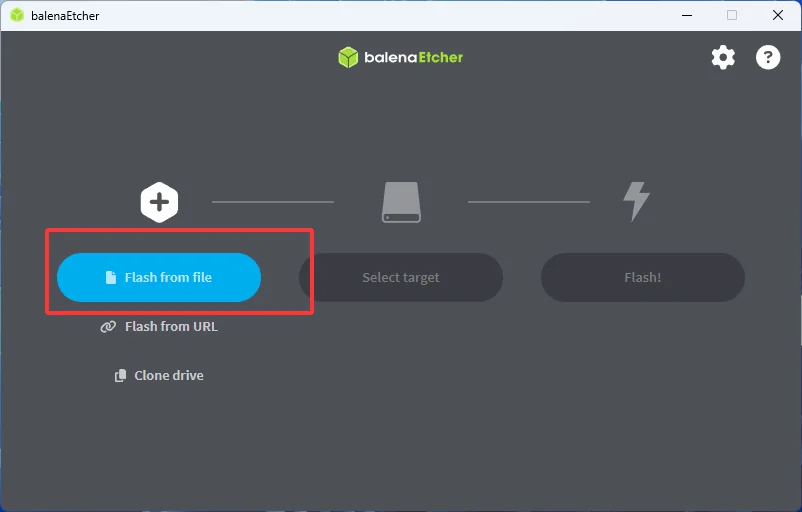
- When the
Missing partition tablewarning appears, clickContinue.
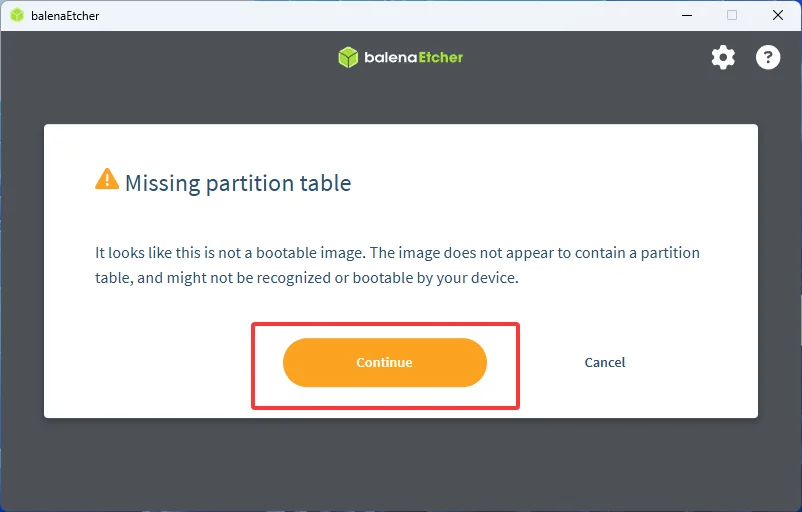
- Click
Select target.
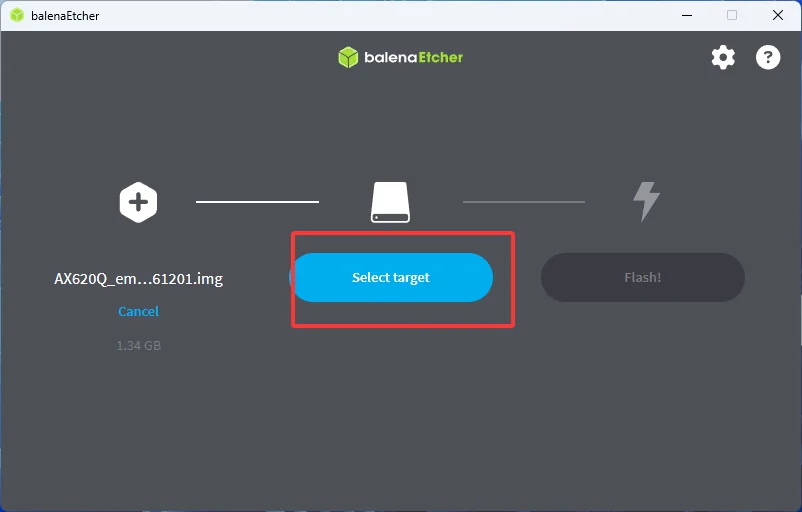
- Select the drive that corresponds to NanoKVM Go (listed as
Compute Module) and clickSelect 1.
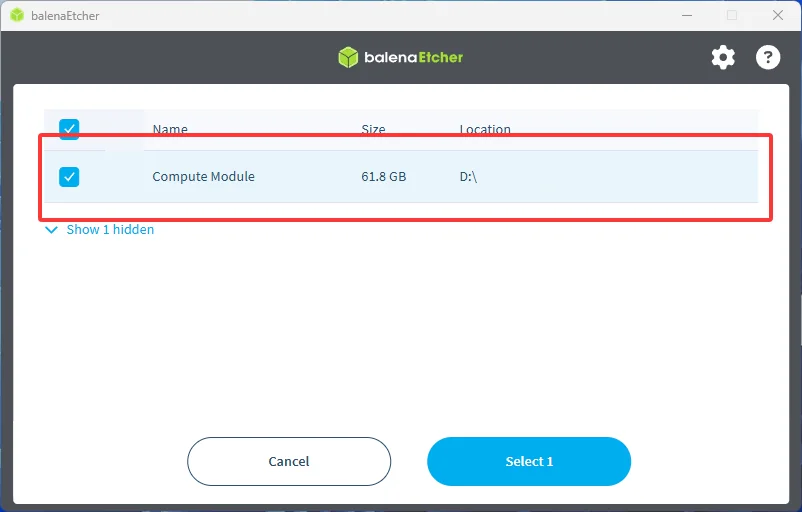
- Click
Flash!and wait for the flashing to finish.
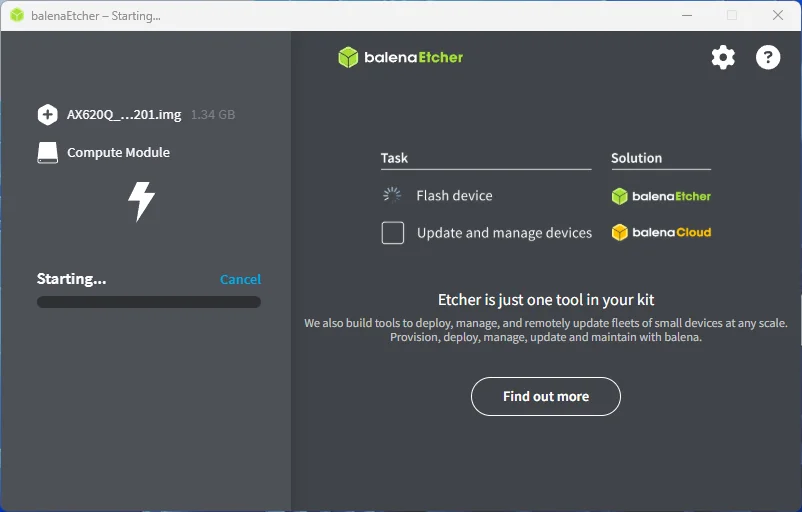
- balenaEtcher reports
Flash Completed!once the image has been written.
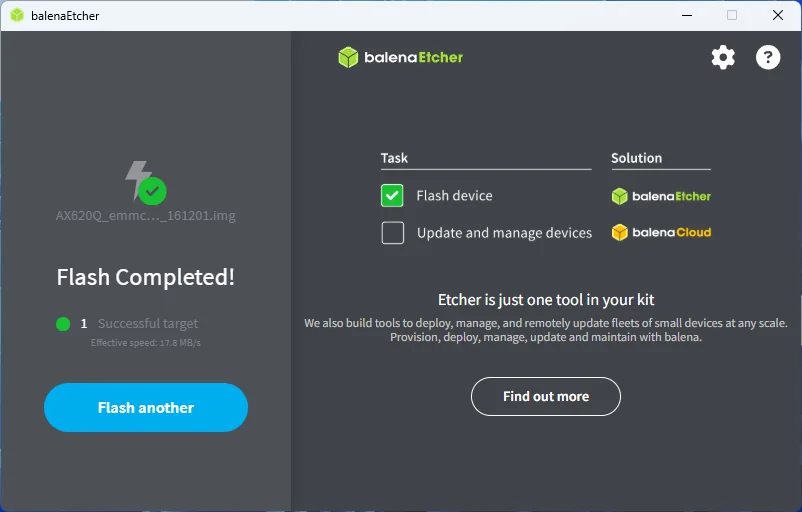
After flashing is complete, safely eject the USB device, disconnect the USB cable, reconnect NanoKVM Go, and wait for the system to boot.
Do not disconnect USB or close balenaEtcher during flashing. Otherwise, the image may fail to write correctly.